Investigating Shaping Options: Functional and Decorative Increases and Decreases
Can shaping be both functional and decorative? The answer is yes and in this blog post, I’m going to tell you why. It all starts with a lesson from my days as a fashion knitwear student.
Ready-to-wear knitwear that you can buy in a shop is usually either cut and sewn or fully-fashioned.
Cut and sew is typically used in more budget knitwear (although not always!) Pattern pieces are cut out of a large piece of knitted fabric and then sewn together using an overlocker. This can be done quite quickly in large quantities.
Fully-fashioned knitwear is usually higher-end because it is a more labour intensive process. The pattern pieces are shaped whilst on the knitting machine (a bit like when you handknit something flat) and then linked together - a method that doesn’t require an overlocker. The result looks more premium because both the inside and outside of the garment are immaculate!
To emphasise the fact that a garment has been fully-fashioned, designers will often highlight the neck, armholes or sleeve caps through their shaping. It becomes both functional and decorative! I love this look and often strive for it in my own knitting pattern designs.
Why Highlight the Shaping?
Whilst some knitting pattern designers hide their shaping in their designs to create a clean, streamlined look, I love to emphasise it. Interesting shaping is something that makers, in particular, appreciate because it is a subtle nod to how something is made.
If you’ve been reading the Sister Mountain blog for a while, you will likely know that I am all about the special details. Highlighting the shaping creates a special detail without looking too fussy.
Decorative Shaping Ideas
Creating decorative shaping doesn’t have to be fancy. In fact, simple shaping done in a very considered way looks amazing!
Whether you’re knitting from the top-down or the bottom-up, your shaping will either lean away from the edge/stitch marker or it can lean towards it. Always make your increases and decreases at least two stitches away from the edge of your fabric or the stitch marker for the most attractive results.
Bottom Up

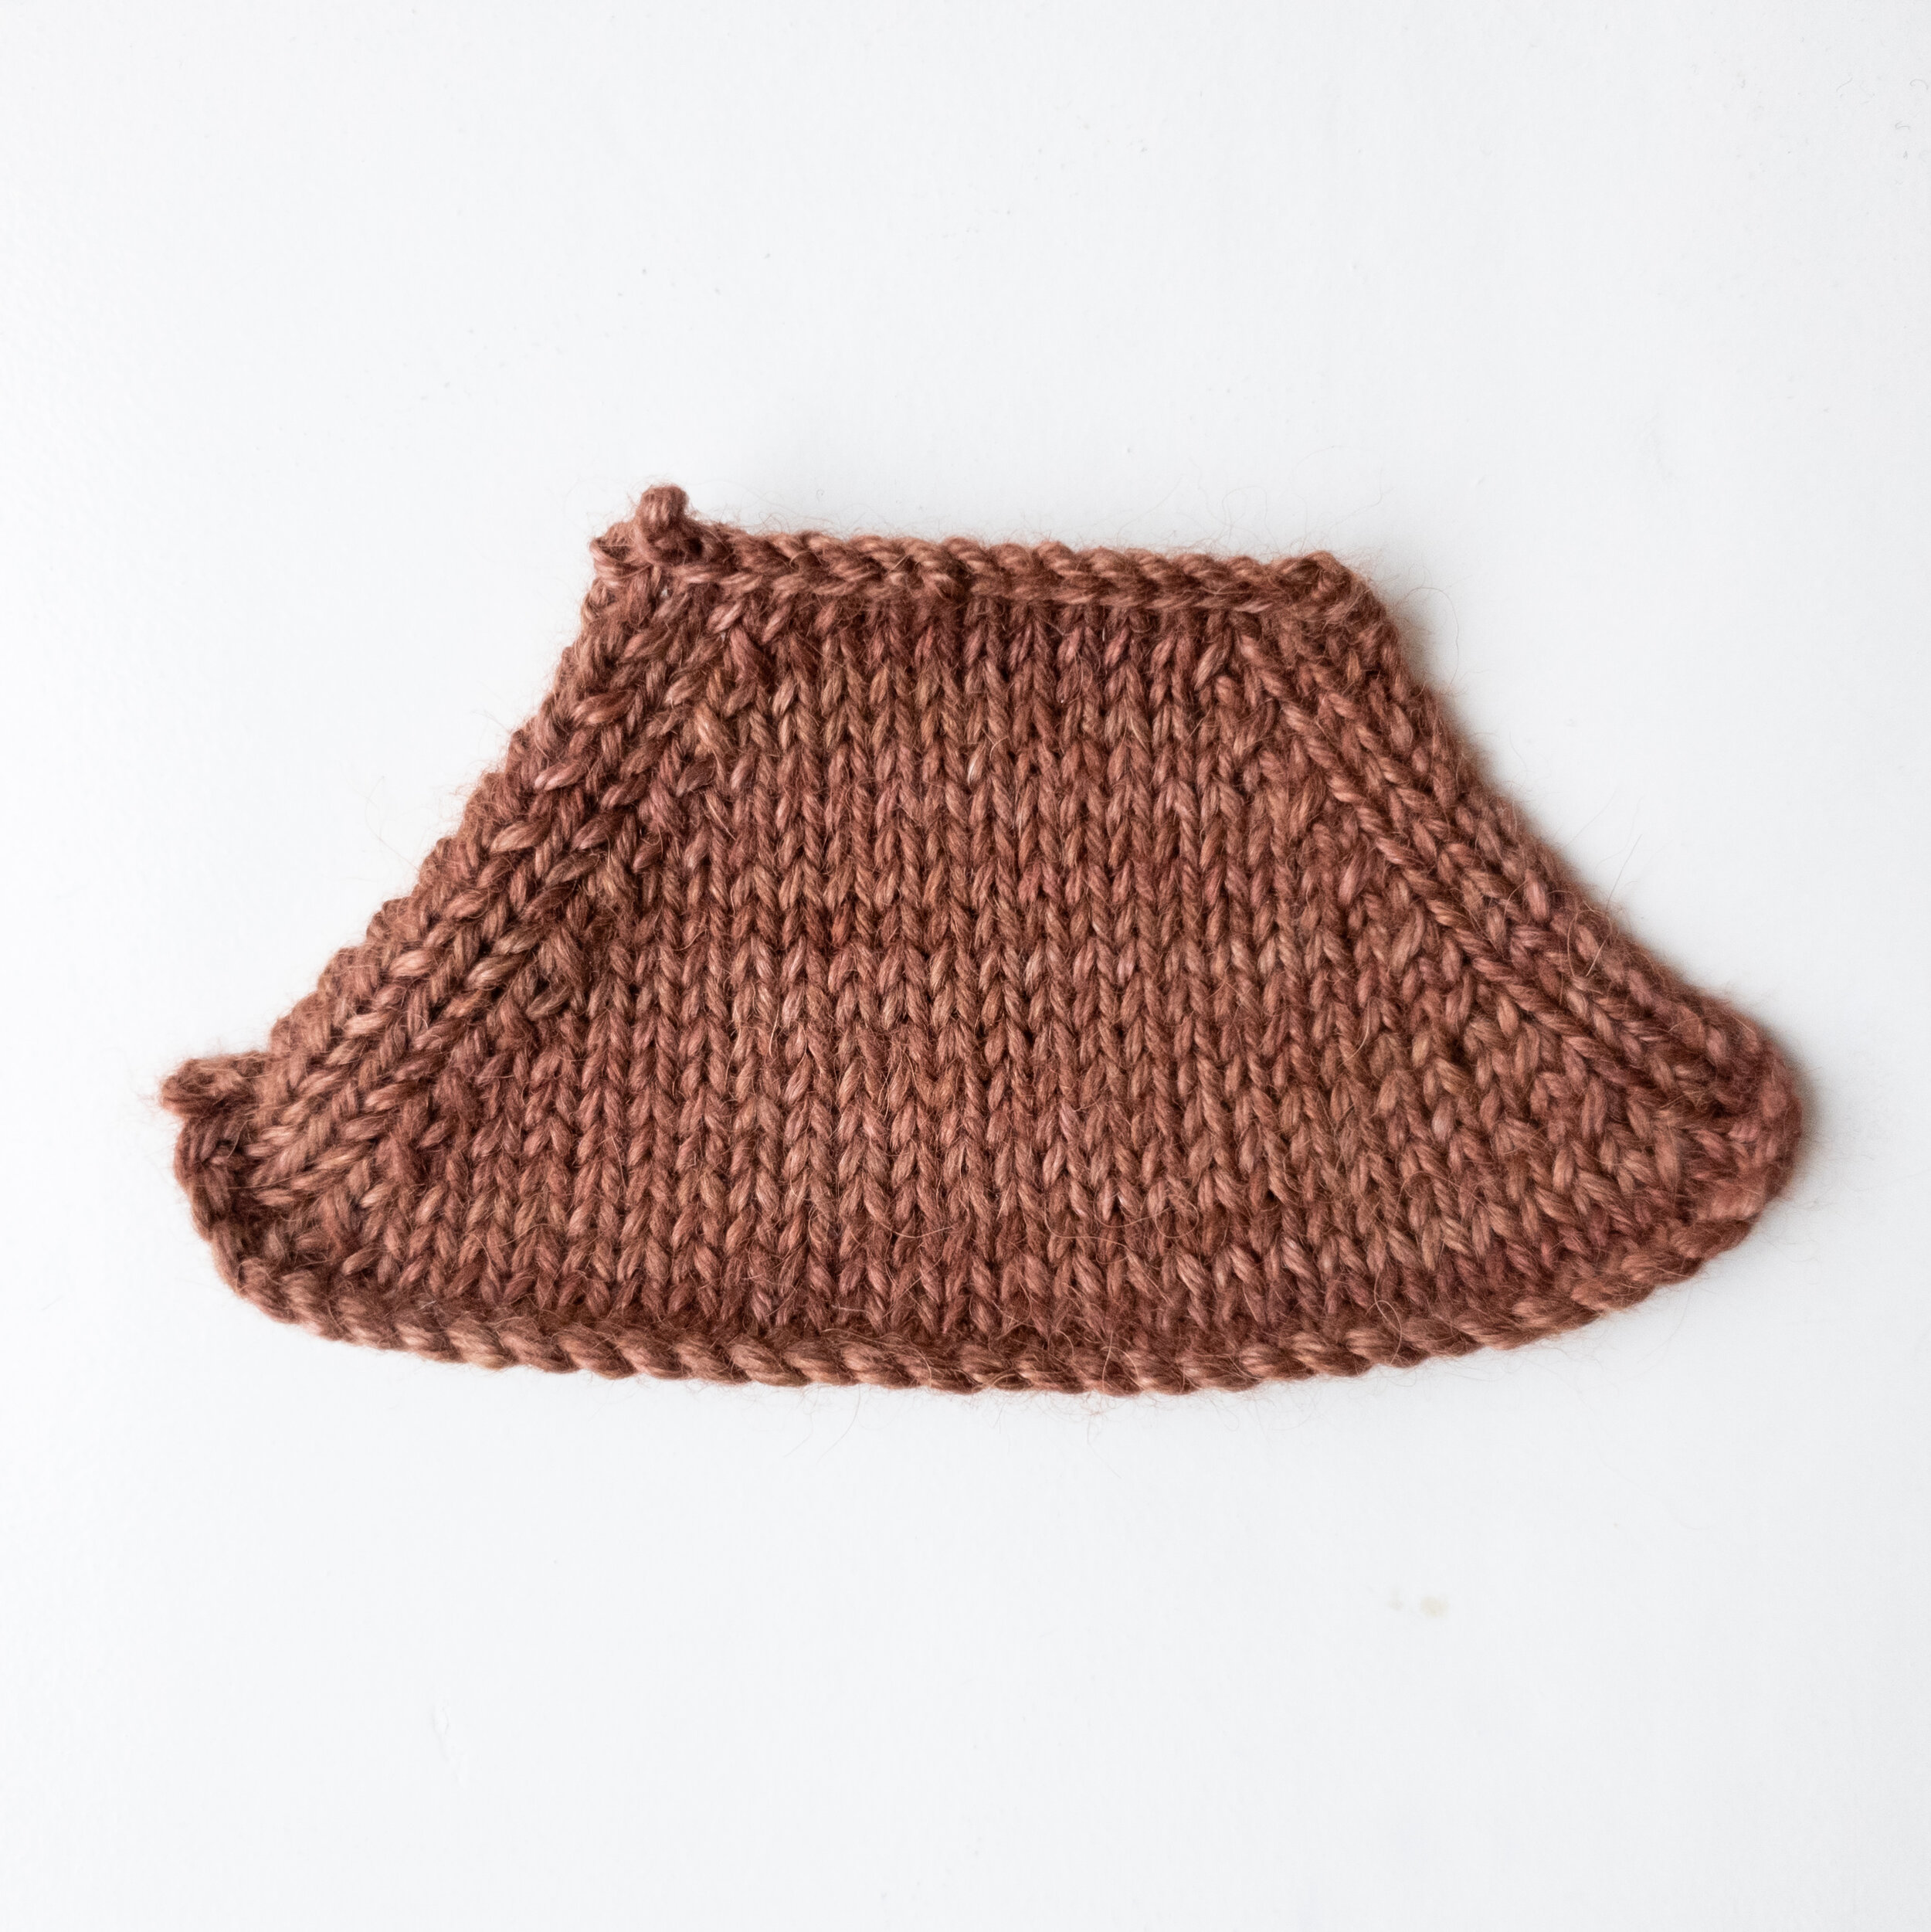
This is an example of raglan shaping knitted flat from the bottom up.
The decreases lean away from the edge of the fabric because I used k2tog on the left side of the swatch and ssk on the right side.
Both decreases are worked 3 stitches away from the edge.
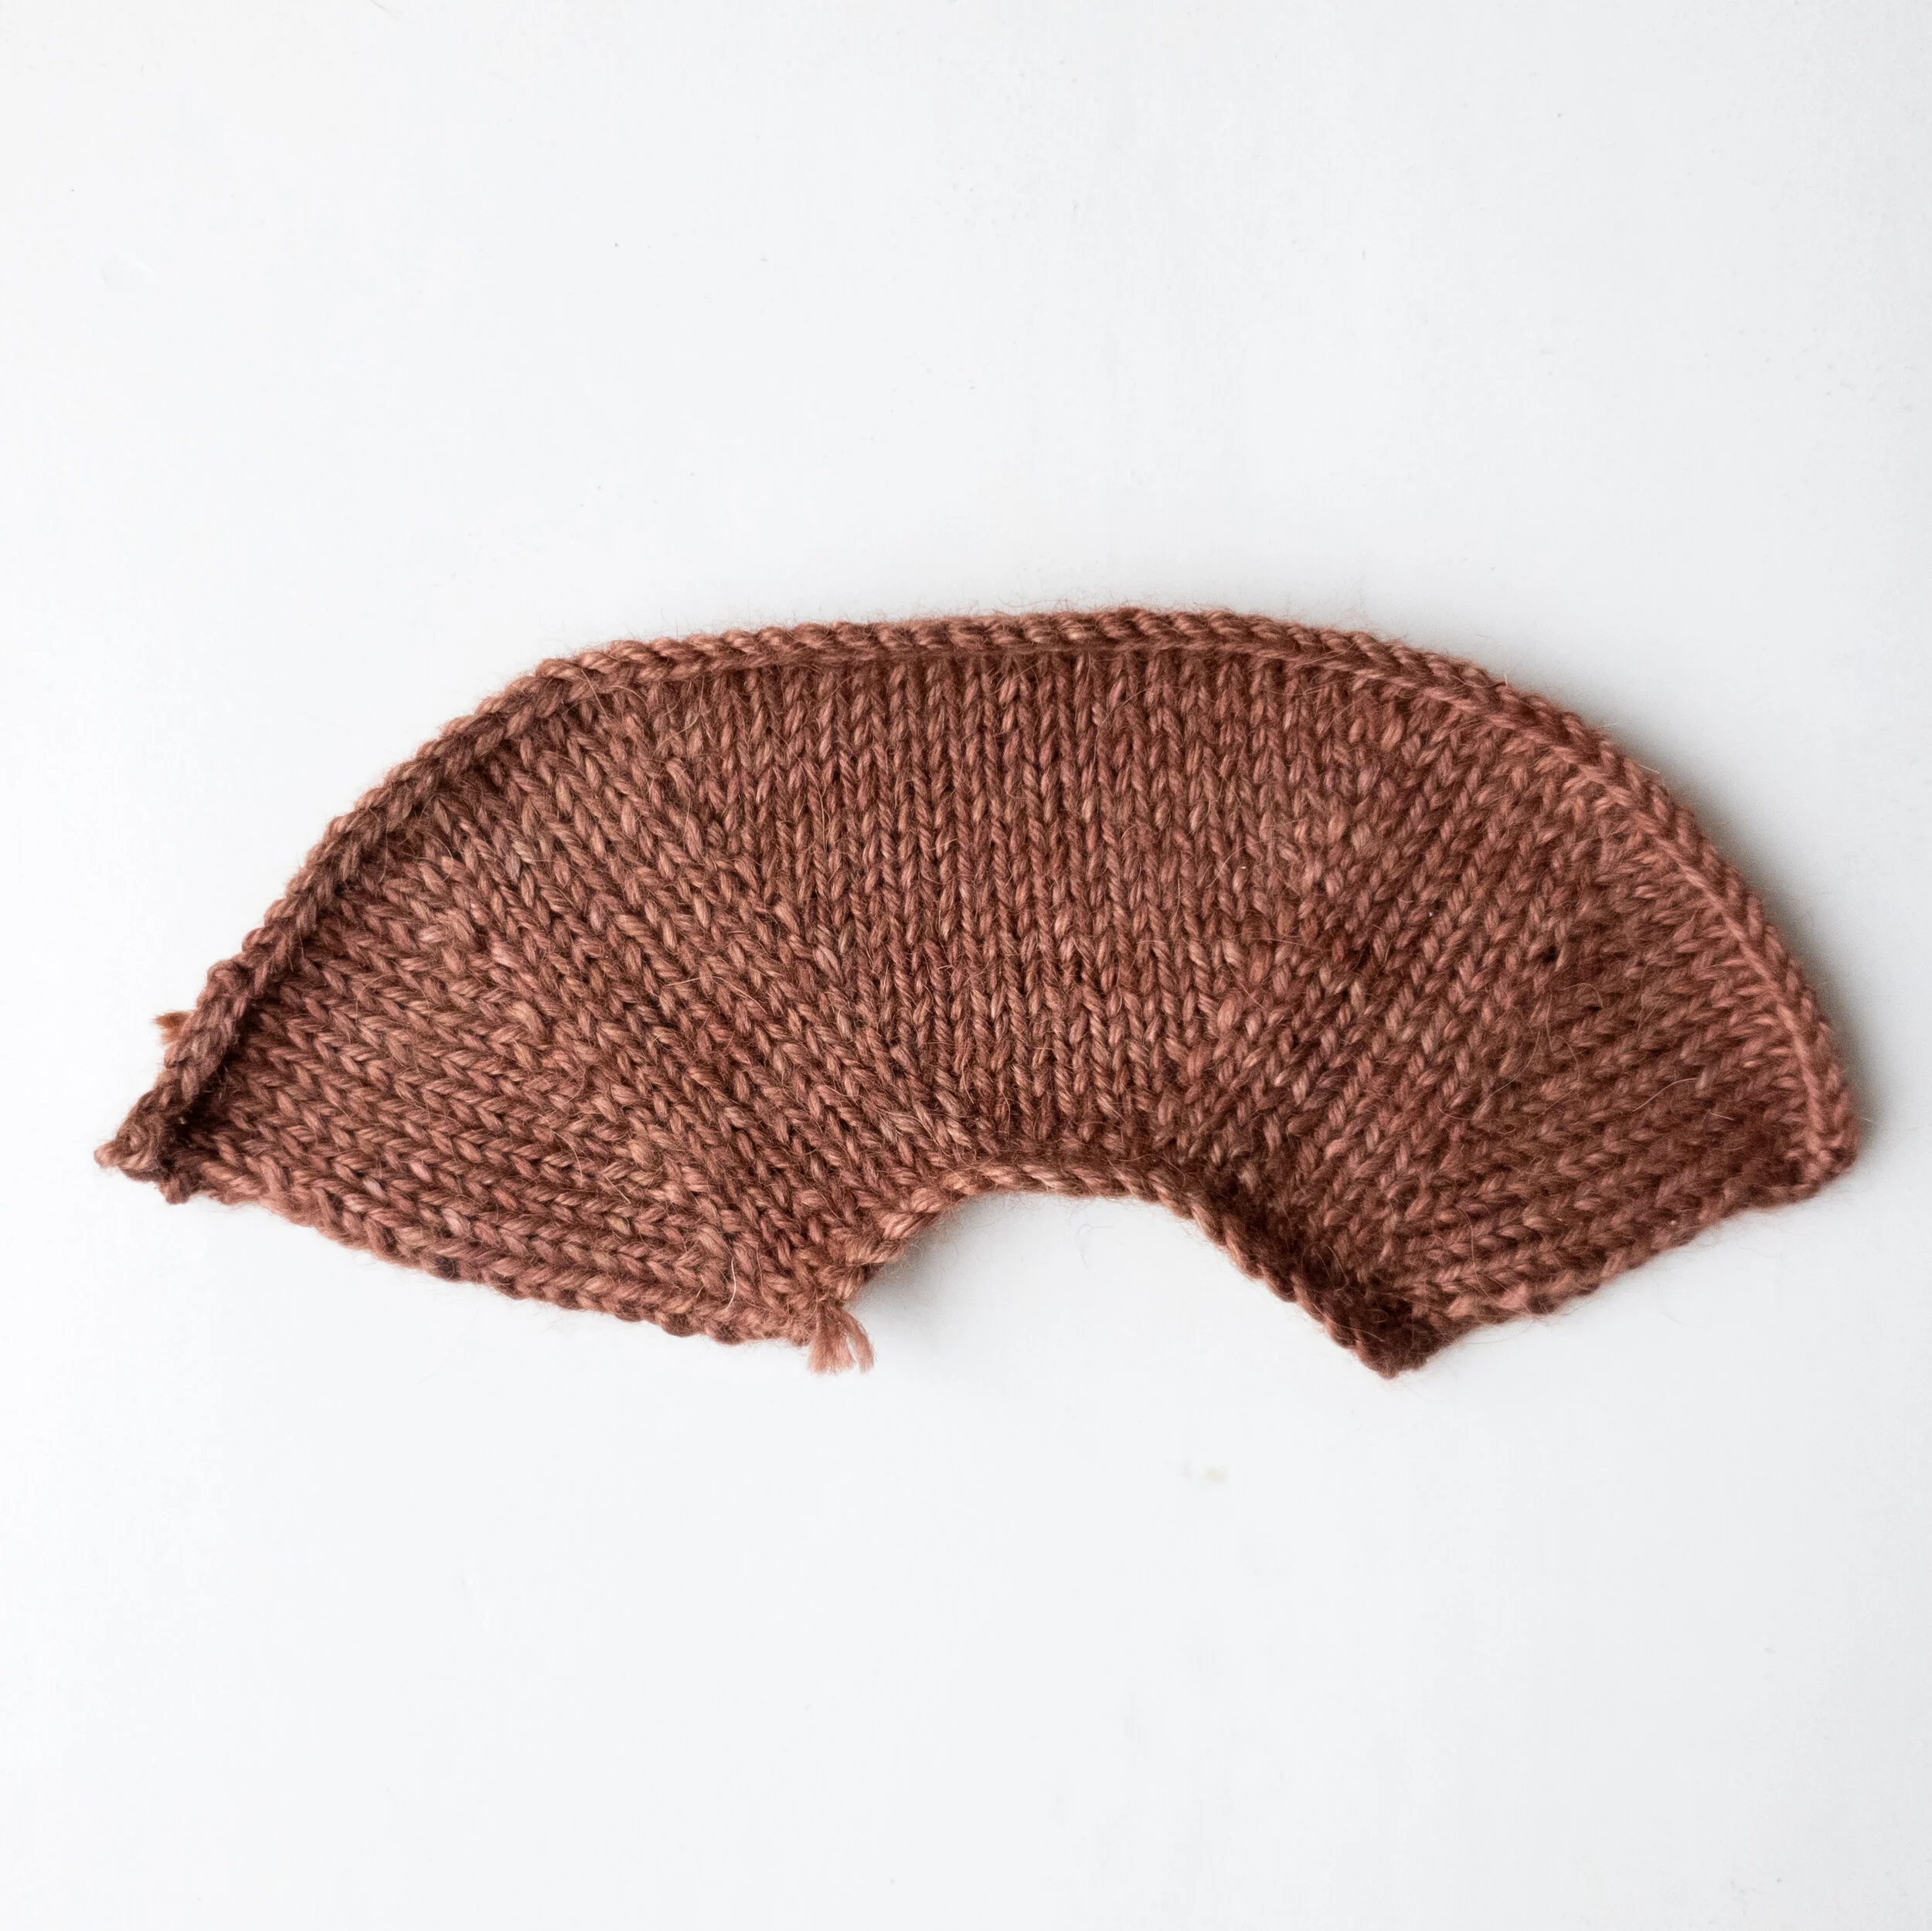
Here is an example of raglan shaping knitted flat from the bottom up.
The decreases lean towards the edge of the fabric because I used ssk on the left side of the swatch and k2tog on the right side.
Both decreases are worked 3 stitches away from the edge of the fabric.
Top Down
Here is an example of raglan shaping knitted from the top down, where the increases lean towards the stitch marker.
This is because I used M1R on the left side of the stitch markers and M1L on the right side.
All increases are worked 3 stitches either side of the stitch markers.

This is an example of raglan shaping knitted from the top down, where the increases lean away from the stitch marker.
This is because I used LLI on the left side of the stitch markers and RLI on the right side.
All increases are worked 2 stitches away from the stitch marker, with a purl stitch on either side of the stitch marker.
Discussion
Which type of shaping do you like the most? Will you be highlighting the shaping in your own designs? Share your thoughts with our community in the comments section below.