How to Write a Pattern Draft Before Knitting the Sample
You might have heard some knitting pattern designers, including myself, say that they write their pattern drafts before knitting the sample. Perhaps you’d like to do the same, but how would you know what to write without actually knitting it?
In this blog post, I’m going to break the whole process down for you, explaining why you might want to write your knitting pattern first, as well as tell you how to actually do it.
Why Write the Pattern Before Knitting the Sample?
Writing up your knitting pattern before starting on the sample sounds like hard work, so why would you bother when you can just write as you go?
I used to feel the same way about the pattern writing process, but when a publication asked me to write my pattern first, I soon realised that there were several benefits to working this way.
You Can Ensure the Design Works Across a Range of Sizes
The benefit of knitting the sample before you write your knitting pattern is that you can adjust the design as you knit so that the sample ends up looking just as you hoped. However, you can’t always be sure that this design will adapt well to the other sizes.
Some design elements that you might have knitted into your sample, such as a large pattern repeat, can be difficult to grade. Typically, sweater patterns increase in size in 2-inch increments. If your pattern repeat is larger than 2 inches wide, it won’t fit into these increments and will therefore limit the number of sizes you can design it for.
If you create your spreadsheet and write up the pattern first, you’d identify this problem before you knit up the sample, allowing you to troubleshoot and find a solution that works for a wide range of sizes. Then, you can knit your sample size knowing that it accurately represents the other sizes too.

Image Description: a close-up of two hands typing in a document on a laptop. In the background is a cup of coffee and some plants.
You Can Be Your First Test Knitter
Even if you thoroughly proofread your draft before sending it to your tech editor, there will still be errors or areas of confusion in your knitting pattern that you miss. It’s just how it goes!
But, when you knit your sample from your pattern draft, you become your first “test knitter”. As a result, you will be much more likely to find errors in the pattern before you send it to the tech editor, which will save you time and money and your tech editor won’t have as many issues to deal with.
Of course, this isn’t a replacement for tech editing or test knitting (both processes are very important), but it does lead to an easier and more streamlined editing process.
You Can Outsource the Sample Knitting
As you work on more and more designs, you may want or need to start working with sample knitters. These are knitters who you pay to knit your knitting pattern sample for you.
Sample knitters can be a real lifesaver when you are working on multiple design projects at once but lack the time to actually knit the sample. This is a problem that I know only too well at the moment, as becoming a parent has massively reduced my knitting time. I have now come to the conclusion that investing in sample knitting is a necessity for the season of life I am in right now.
By writing up the pattern draft first, your sample knitter is able to knit from it, hence freeing up your time for other design projects.
Some Knitting Pattern Publications Require It
If you are planning to get your knitting patterns published, you might be surprised to hear that some publications require you to give them a copy of the pattern draft for tech editing, before you knit the sample.
This can be extremely stressful if you are not accustomed to working this way! Adjusting your own standard design process to accommodate this method of working means that you’ll be prepared if a magazine or yarn company asks you to work this way.
Image Description: Graphic that says “How to Write a Pattern Draft Before Knitting the Sample” on top of an image of two hands on a laptop keyboard.
If the idea of writing a knitting pattern draft before you knit the sample feels overwhelming, you’re not alone. SO many new knitting pattern designers feel the same way! Thankfully, the process gets far easier the more you do it, particularly if you follow these steps.
Knit a Mini-Garment Swatch
Sometimes, it can be challenging to visualise how you might knit or construct a certain element in your design without actually doing it yourself with your own two hands. That’s why I love knitting mini-garment swatches, alongside my standard gauge swatches.
Mini-Garment Swatches are swatches that test out the main elements of your design or construction on a small scale without you needing to knit the sample yet.
They don’t actually have to look like finished garments, however, it is useful to test out any areas of your design that you’re not sure about, such as how far away to place shaping from the fabric’s edge or how to construct the sleeve cap.
It doesn’t really matter what they look like in the end, as long as they help you to gain a better understanding of how you might knit up your design.
Write a Construction Summary
No matter your design, it likely follows a typical construction style, so it can be helpful to write a step-by-step summary of how you will construct it.
You don’t need to get technical or add in any numbers at this point. The purpose of this step is to create a framework for your pattern to follow. Later, you will use this to help you write your pattern instructions, adding the numbers from your pattern spreadsheet.
For example, here is a construction summary for a super simple, top-down, drop-shoulder pullover:
Cast on the full width of the garment’s shoulders
Knit upper back straight for the depth of the armhole and put the stitches on hold
Pick up stitches for the front shoulders, leaving a gap for the back neck, and shape each side of the front neck
Cast on for the bottom of the front neck and join to knit the chest straight until the armhole depth is reached.
Join the front and back body and knit in the round until your desired sweater length is reached
Pick up the sleeve stitches around each armhole and knit the sleeves for the required length, incorporating any shaping
Pick up and knit the neckband
Create a Pattern Spreadsheet
Before you start writing your knitting pattern draft, you will need to fill out your pattern spreadsheet. In fact, this remains the same whether you’re writing the pattern or knitting the sample first, as your pattern spreadsheet provides you with all of the stitch and row counts as well as shaping rates that you need to create your design.
If you need help with creating your pattern spreadsheet, I share my process in this blog post all about grading knitting patterns using a spreadsheet.

Image Description: Image that says “Knitting Pattern Design. How to Write a Pattern Draft Before Knitting the Sample. www.sistermountain.com” beneath an image of a woman sitting in front of a silver laptop and concentrating.
Start Writing Your Draft
If you’ve followed all of the previous steps, you are now ready to start writing your pattern draft. You might feel a little intimidated by this step, but with your construction summary and your pattern spreadsheet, you have everything you need.
Consider each step in your construction summary and then find the corresponding numbers, for all sizes, in your pattern spreadsheet. Then, you can write the instruction.
For example, if you need to cast on the full width of the shoulders, look at your pattern spreadsheet and see how many stitches are needed for the full shoulder width. Based on that, your pattern instruction might look something like this:
Using the Cable Cast-On, cast-on 104 [114, 128, 140, 150, 162, 176, 188, 198] sts.
Likewise, if you need to knit the upper back straight for the depth of the armhole, look at your pattern spreadsheet and see how many rows are used in the armhole depth. The resulting pattern instructions might be something like this:
Row 1 (RS): Knit to end.
Row 2 (WS): K1, purl to last st, k1.
Rep last 2 rows 28 [30, 33, 35, 37, 40, 41, 44, 45] more times, ending on a WS row.
The language that you use to write your pattern instructions is partially personal preference, so don’t get too hung up on that. Some designers prefer to use more explanation than others, but as long as you follow the typical structure and abbreviations used in a knitting pattern and you give accurate numbers, that’s absolutely fine.
You will likely find that you get to steps in your construction summary where you haven’t calculated the necessary numbers in your pattern spreadsheet yet - that’s totally normal. Just go back to your spreadsheet and calculate them, before adding them to your pattern instructions.
What if I Get Stuck?
If there are steps in your pattern instructions that you are not sure how to write up, you can knit more mini-garment swatches to help you test it out and problem-solve the construction. It’s a much faster way of figuring problems out in a tangible way.
Additionally, your pattern won’t be perfect at this stage. Don’t worry! Once you have knitted the sample, had it tech edited and put it through test knitting, it will be in much better shape. This pattern draft is just that: a draft, and it will improve a lot throughout the design process.
Conclusion
Whilst it might feel a little intimidating to write your knitting pattern draft before you actually knit the sample, swatching, creating a construction summary and making a pattern spreadsheet will help a lot with writing your pattern instructions.
I’m not going to lie: the first time you do this will be challenging, but I promise you that the more you do it, the easier the process will become. As a result, you will have more accurate patterns that are designed to fit a wide range of sizes beautifully. It is so worth it!
FREE, ON-DEMAND VIDEO WORKSHOP
How to Confidently Design Multi-Size Sweater Patterns
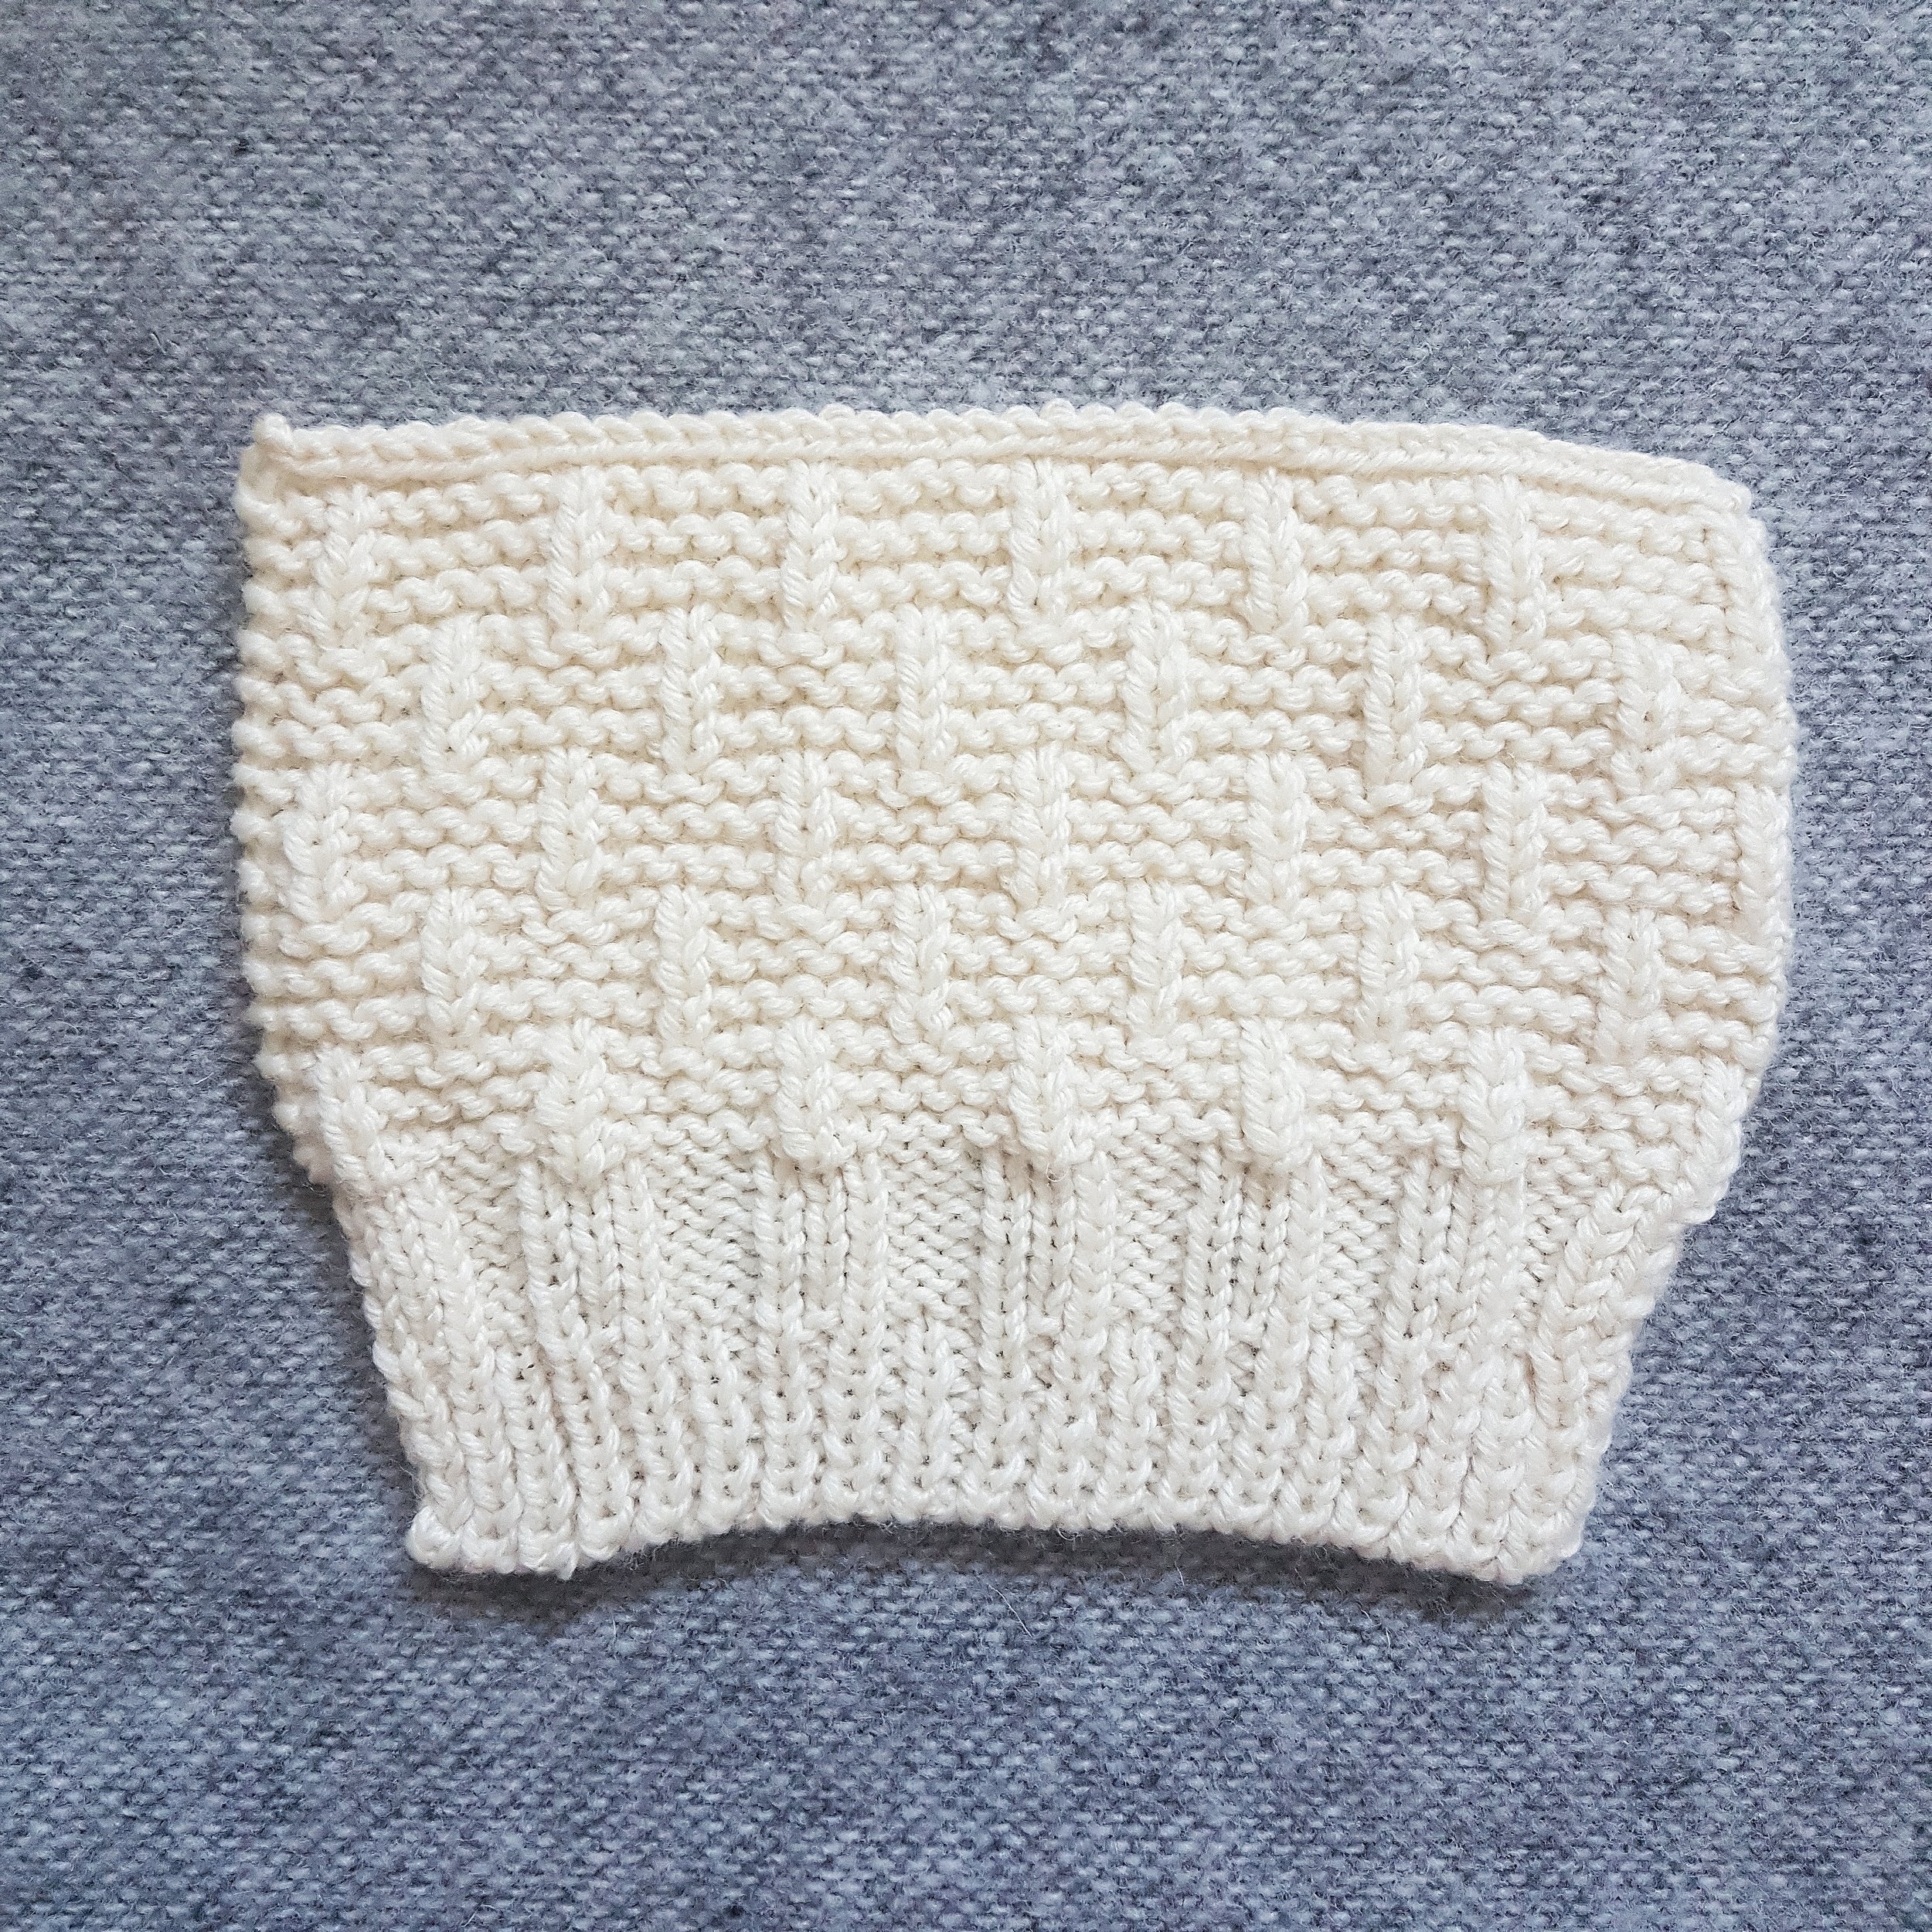
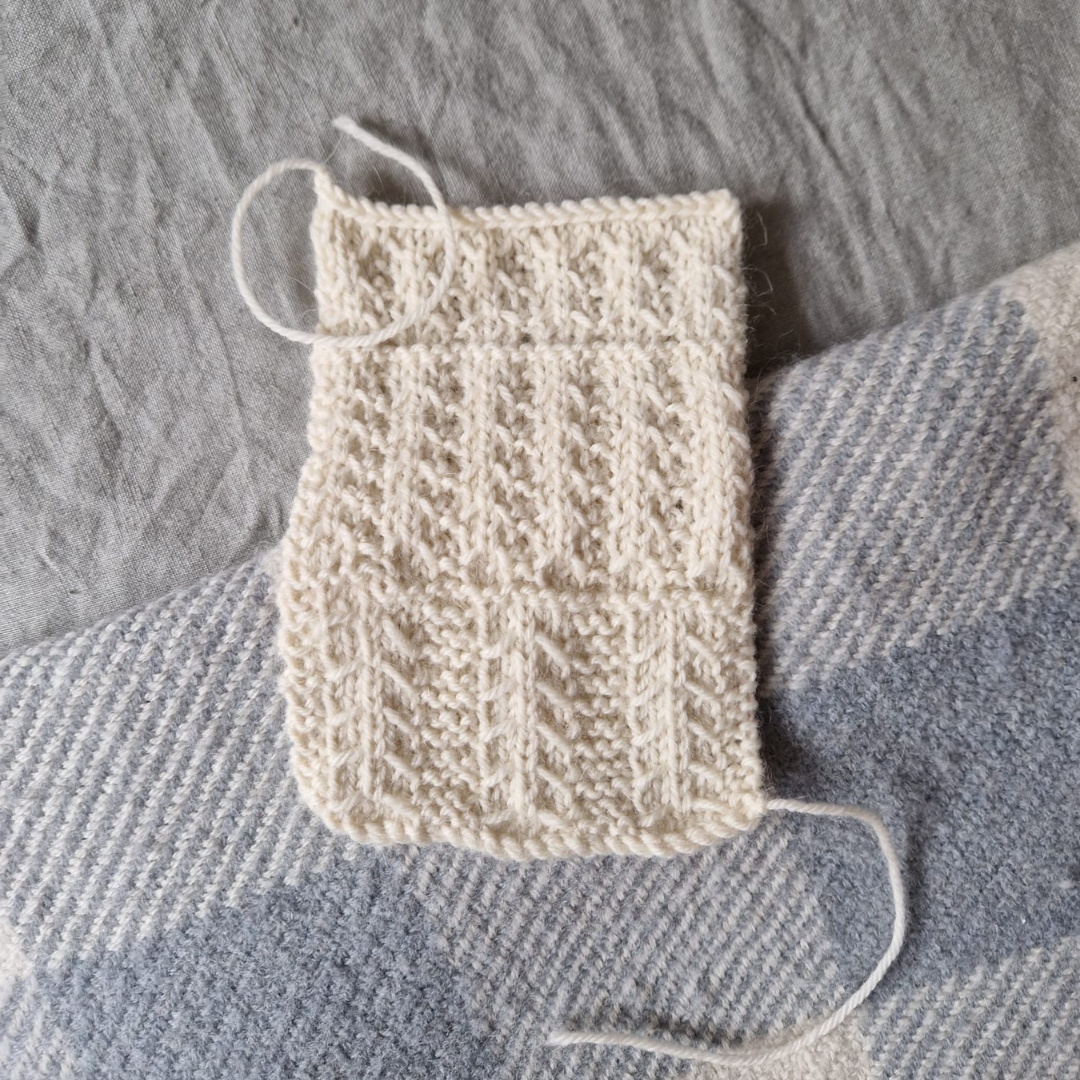
Image Description: White chunky swatch with garter basket weave stitch and two types of ribbing, on a grey woollen background.